

前言
提到 Xray,如今可谓是无人不知无人不晓。但提到 rprx,谁知道是什么?
对,他就是VLESS协议的设计者。在最开始的 XTLS 库中,他甚至写下了 “The Future” 的霸气描述,但是从使用表现上来看,XTLS 无愧于 rprx 的评价,算得上是划时代的革命性概念与技术。那,我们为什么要做回落呢?今天也可以简单的说一下。
我们众所周知的防火墙,其中一种功能就是主动探测,主动探测就是通过发送特定的网络请求,并解读服务器的回应内容,来推测服务端是否运行了 Xray/V2Ray/Shadowsocks 等一些代理工具,一旦准确认定有这些东西,那么服务器可能就会受到干扰或是阻断。
本期视频视频观看:点击播放

准备工具
1、VPS 一台,重置好主流的操作系统
2、域名一个,解析到该VPS。
3、自行开启 BBR 加速,忘记脚本请点击
4、以下的所有步骤请不要颠倒
5、不会请 点击观看视频教程
开始搭建Xray
更新系统
CentOS 需要安装开源发行软件包版本库,命令如下
yum install epel-release -y
yum update -y
Debian更新系统较为简单
apt update -y
安装 Curl Nginx Tar
yum install curl tar nginx -y   #CentOS命令
apt install curl tar nginx -y   #Debian命令
CentOS 为了避免FireWalld,请务必直接执行下面代码,Debian跳过
firewall-cmd --zone=public --add-port=80/tcp --permanent
firewall-cmd --zone=public --add-port=443/tcp --permanent
firewall-cmd --reload
启动 Nginx服务
(PS:在执行下面命令之前,最好重启一下VPS,以免上述的更新命令没有完成导致 Nginx 无法启动,有的搬瓦工机器需要人工重启——因为我遇见过一次)
systemctl start nginx
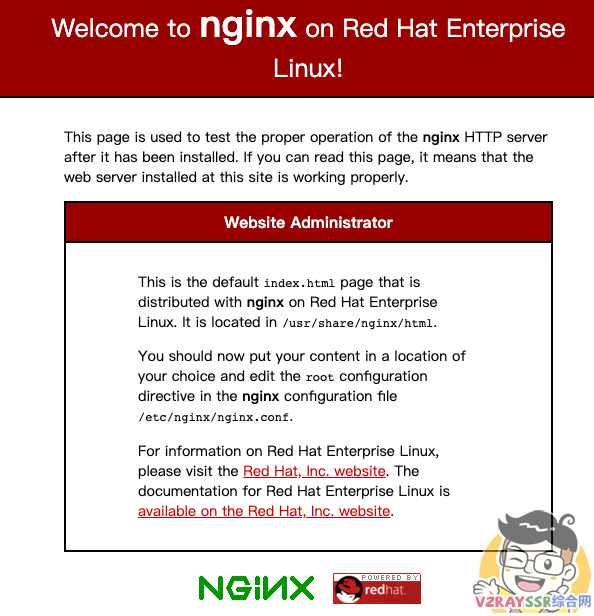
现在可以在浏览器中输入你的域名,看看是否可以访问到 Nginx 的欢迎页面(千万别被红色吓住了)
安装官方Xray服务
以下一键安装程序来源于官方
bash -c "$(curl -L https://github.com/XTLS/Xray-install/raw/main/install-release.sh)" @ install -u root
UUID 随机生成代码
cat /proc/sys/kernel/random/uuid # 粘贴到VPS运行即可生成 UUID
安装完毕以后,在VPS目录 /usr/local/etc/xray 找到 config,json 文件,贴入下面的配置文件
{
    "log": {
        "loglevel": "warning"
    },
    "inbounds": [
        {
            "listen": "0.0.0.0",
            "port": 443,   //监听的端口
            "protocol": "vless",
            "settings": {
                "clients": [
                    {
                        "id": "5272bc0d-9852-4af7-b2f0-979b1faf2973", //此处为你的UUID
                        "level": 0,
                        "email": "[email protected]",
                        "flow":"xtls-rprx-direct"
                    }
                ],
                "decryption": "none",
                "fallbacks": [
                    {
                        "dest": 33222  //默认回落端口
                    },
                    {
                        "alpn": "h2",
                        "dest": 33223  //https回落端口
                    }
                ]
            },
            "streamSettings": {
                "network": "tcp",
                "security": "xtls",
                "xtlsSettings": {
                    "serverName": "test.bozai.us",  //你的域名
                    "alpn": [
                        "h2",
                        "http/1.1"
                    ],
                    "certificates": [
                        {
                            "certificateFile": "/usr/local/etc/xray/cert/cert.crt",
                            "keyFile": "/usr/local/etc/xray/cert/private.key"
                        }
                    ]
                }
            }
        }
    ],
    "outbounds": [
        {
            "protocol": "freedom",
            "settings": { }
        }
    ]
}
为域名申请证书
若你是用下面的 acme 脚本无法申请的话,请 点击这里用其他方式申请
以下六行脚本请逐行复制粘贴到 VPS 运行
(PS:务必修改下面的域名为你自己的域名)
curl https://get.acme.sh | sh
~/.acme.sh/acme.sh  --issue  -d test.bozai.us  --webroot /usr/share/nginx/html/
mkdir /usr/local/etc/xray/cert
~/.acme.sh/acme.sh --installcert -d test.bozai.us --key-file /usr/local/etc/xray/cert/private.key --fullchain-file /usr/local/etc/xray/cert/cert.crt
~/.acme.sh/acme.sh --upgrade --auto-upgrade
chmod -R 755 /usr/local/etc/xray/cert
证书默认的更新周期为60天(自动),若是出问题,请再次自行框内的代码即可
修改 Nginx 配置文件
找到VPS目录 etc/nginx/nginx.conf 文件,修改如以下配置
user  root;
worker_processes  1;
#error_log  /etc/nginx/error.log warn;
#pid    /var/run/nginx.pid;
events {
    worker_connections  1024;
}
http {
    include       /etc/nginx/mime.types;
    default_type  application/octet-stream;
    log_format  main  '\$remote_addr - \$remote_user [\$time_local] "\$request" '
                      '\$status \$body_bytes_sent "\$http_referer" '
                      '"\$http_user_agent" "\$http_x_forwarded_for"';
    #access_log  /etc/nginx/access.log  main;
    sendfile        on;
    #tcp_nopush     on;
    keepalive_timeout  120;
    client_max_body_size 20m;
    #gzip  on;
server {
    listen 127.0.0.1:33222;
    server_name  test.bozai.us;
    root /usr/share/nginx/html;
    index index.php index.html index.htm;
}
 server {
    listen 127.0.0.1:33223 http2;
    server_name  test.bozai.us;
    root /usr/share/nginx/html;
    index index.php index.html index.htm;
}
server {
    listen       0.0.0.0:80;
    server_name  test.bozai.us;
    return 301 https://test.bozai.us$request_uri;
}
}
设置 Nginx 开机启动,并重新启动 Nginx
systemctl enable nginx
systemctl restart nginx
检验Xray配置文件
systemctl restart xray  #重启xray服务
systemctl status xray  #查看xray运行状态
下载伪装网站及部署
默认的网站主程序文件夹在 /usr/share/nginx/html/ ,大家可以自行的替换里面的任何东西(整站程序)
rm -rf /usr/share/nginx/html/*
cd /usr/share/nginx/html/
wget https://github.com/V2RaySSR/Trojan/raw/master/web.zip
unzip web.zip
systemctl restart nginx
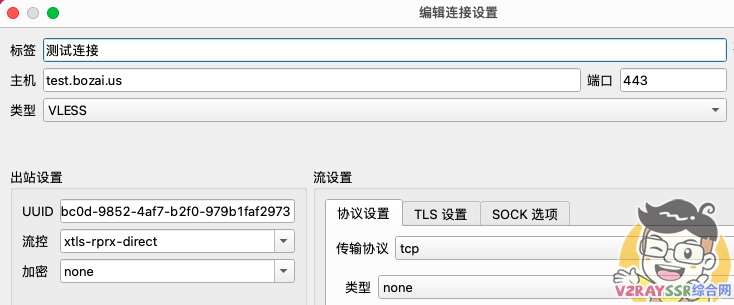
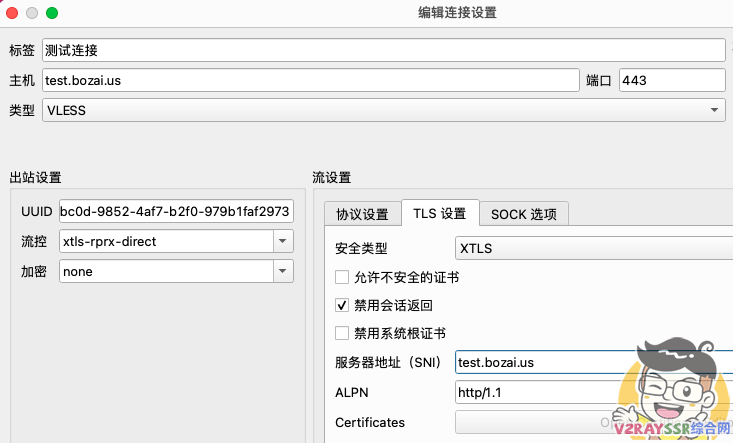
到此,就部署完毕了。相对来说也是很简单。现在你就可以打开 QV2ray 和 V2ray 连接你的节点了
具体的填入参数可以参考下图:
后记
这期教程只是为了以后的教程做铺垫,是否很简单?
让我们畅快的去看小姐姐吧。
有什么好的建议,或是有什么你想要的话题,欢迎来电报群!
反馈一下,centos7环境下安装Nginx,不会提示Welcom to Nginx这个欢迎页面了,但nginx安装是正确的只是显示页面改变了
不知道为什么,我的XRAY提示配置文件第23行错误。不知道怎么办。
一次搭建成功!感谢波仔。非常详细,完全无门槛,非常实用。
你好,请问xray一键脚本和今天这个分步骤脚本的区别是什么?